As soon as Windows 7 is installed it is wise to change some security related settings. Windows has some security tools like a firewall (for controlling the network connection), Windows Update (for updating system files and/or adding feautures) and Windows Defender (for protection against spyware and other malware). User Account Control prevents users to make changes to the Windows system which can demage the reliability of the system. Finally some network related security settings can be changed, e.g. the visibility of the computer in the network and sharing of files and printers!
The Action Center is used to keep Windows secure: a central place for the status of security cettings. If there is something wrong or missing concerning the security settings, the action center will show a warning to the user indicating that some action is required.
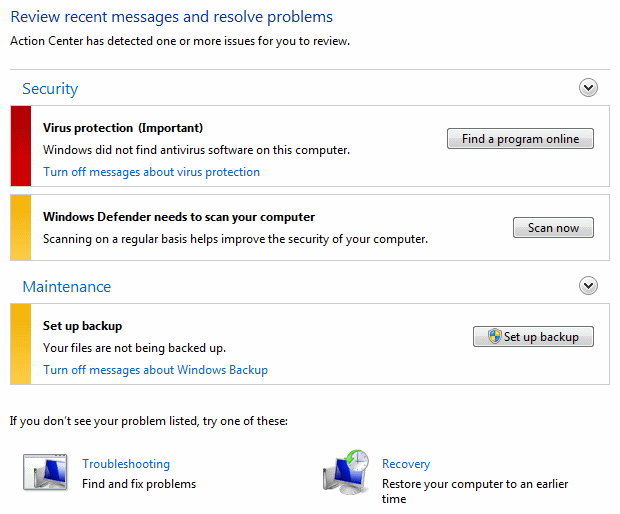
The Action Center (available in the control panel) monitors the computer and warns the user if there are security issues. The action center contains two categories: Security and Maintenance (click the titles to expand the menu). As soon as the action center detects a problem a warning flag in the system tray. By clicking this flag the action center is opend showing links to solve the problem. Immidiate after installation of Windows the action center shows two warnings because a virusscanner is not installed yet and there has not been made a plan for an automatic back-up of the personal files. The action center shows similar warning messages in case of other security issues like problems with Windows Update, the internet security settings, the firewall, the virusscanner, anti-spyware, User account control.
|
|
ATTENTION: There are multiple free antivirus tools like AVG Anti-Virus, AntiVir en AVAST available for Windows 7. These antivirus tools are recognized by the action center and will remove the warning message.
Disable warnings action center
The security issues found by the action center can be solved immediately (in
this example by clicking the buttons Find a program online and Set up
backup) but frequently retuning warnings can be disabled as well (in this
example by clicking the link Turn off messages about virus protection and
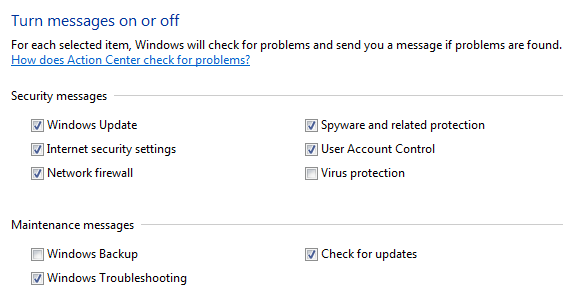
Turn off messages about Windows Backup). The task Change Action Center
settings
(at the left in the task pane) shows an overview of the different warnings each
with the option to disable them. Be careful disabling warnings because Windows
won't show warnings anymore when the security level has been lowered (by
accident or not)!
INCORRECT ACTION CENTER WARNINGSSometimes the action center warns falsely that no virusscan software and/or firewall is installed. This can be the case after security software has been removed or newly installed. Fortunately this can be solved easily: start the Microsoft Management Console to manage the Windows 7 services, right click the service Windows Management Instrumentation and select Stop to stop this service temporary (confirm the warning that the depending services can be stopped as well). Next step is to open the Windows Explorer and remove the folder C:\Windows\System32\Wbem\Repository (files and subfolders included). After the computer has been rebooted, the stopped services will be started automatically, the folder Repository recreated and the action center information will be updated correctly. |
By default the internet connection is secured with the Windows Firewall. Go to the option Windows Firewall in the Control Panel, task Allow a program or feature through Windows Firewall to change the firewall settings by program (allow or block a programs access to the internet). The task Advanced settings has a lot more firewall settings. Because the Windows Firewall by default allows all programs to access the internet and it is hard to change the settings, it is better to install an alternative firewall and (if needed) the Windows firewall can be disabled using the task Turn Windows Firewall on or off.
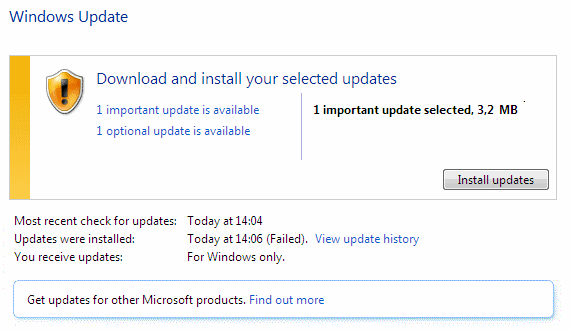
After Windows has been installed and the internet connection has been established, it is time to check for (important and optional) Windows updates. The procedure to install the updates is simple: open the Control Panel and click the sub Windows Update. By default only the important updates are selected to be downloaded and installed. By following the link for the available optional updates other updates can be added to the list of updates to be installed. After the button OK is clicked the selected updates will be downloaded and installed immediately. If an update is not wanted (whatever the reason is) it can be hide by right clicking the update and selecting the option Hide update (to unhide the hidden updates open the task Restore hidden updates, activate the update and click the button Restore. Some updates require a restart of the computer, if this is the case the on/off button in the start menu shows the update shield with a message that the updates will be installed automatically when the computer shutdown.
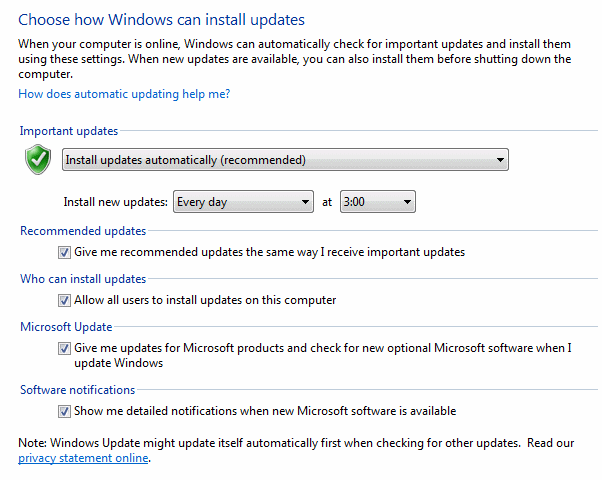
The task Change settings has an option to change the update frequencie, the update time and the type of updates. By default all downloaded updates are installed automatically, do not change this setting unles a slow internet connection is used. If other Microsoft products (like Office) are installed, activate the option Give me updates for Microsoft products and check for new optional Microsoft sofware when I update Windows aswell.
TIP: For some updates, Windows asks the user to reboot the computer to finish the installation of the update. When there is still a user logged on, a reboot is not always desired. The automatic rebooting of Windows can be disabled by a change in the registry, in which case the update will be installed at the next boot. This is done by adding a new DWORD value NoAutoRebootWithLoggedOnUsers with the value 1 in the registry key HKLM\SOFTWARE\Policies\Microsoft\Windows\WindowsUpdate\AU (create the keys WindowsUpdate and AU manually if needed).
Deleting the update files
By default, Windows Update stores the update files in the folder C:\Windows\SoftwareDistribution.
In time, Windows Update will download and install many updates. Because
the downloaded update files won’t be removed after installation, this folder
keeps growing. By deleting the already installed update files, a lot of hard
disk space will become available for other purposes. This can be done by
deleting the folder SoftwareDistribution (files included), which can only
be done by first disabling the service Windows Update. Right click the
service Windows Update (see the page
Windows Services) and
select Stop.
The folder C:\Windows\SoftwareDistribution
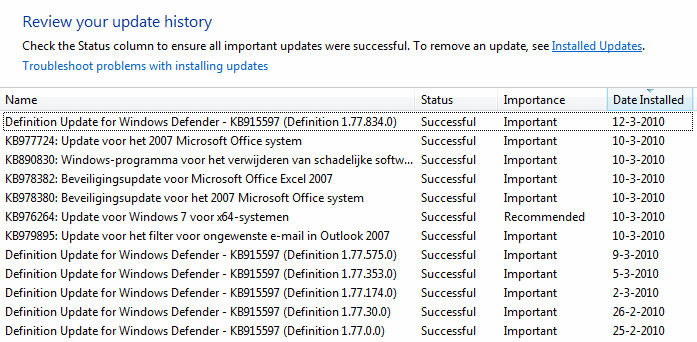
can be deleted a few seconds later. The update history (see the screen dump) will be deleted as well, but that causes no
problem. Restart the service and Windows will recreate the deleted folder. The
only thing left to do is to enable the option to update other Microsoft products
at the bottom of the Windows Update-page.
Solving Windows Update problems
Problems with Windows Update are quite common: already installed updates keep
coming back after a restart or Windows Update shows an error message and refuses
to go on. Many of these problems can be solved easily by resetting
Windows Update which is done by deleting the folder
SoftwareDistribution as described above! This will delete the update installation files and the
update history and restore the update function. If there is
still a problem with Windows Update after deleting this folder, make sure
the service Windows Modules Installer
is enabled. Reset the
Internet Explorer
settings as well: Tools, Internet
Options, tab Advanced, button Reset. After resetting Internet Explorer it
is necessary to reset the homepage and to change some settings (e.g. activate
some add-ons by Tools, Manage add-ons).
SYSTEM UPDATE READINESS FOR WINDOWS 7Try the System Update Readiness repair tool (download: http://support.microsoft.com/kb/947821/) if the above tips didn't fix the problems with Windows Update. This tool is used for fixing some specific inconsistencies which cause problems installing updates and other software (showing the error messages 0x80070002, 0x8007000D, 0x800F081F, 0x80073712, 0x800736CC, 0x800705B9, 0x80070246, 0x8007370D, 0x8007370B, 0x8007370A, 0x80070057, 0x800B0100, 0x80092003, 0x800B0101 en 0x8007371B). Normally this tool is offered automatically by Windows update in case one of these problems occur but if needed System Update Readiness can be downloaded from the Microsoft website as stand alone tool as well. Pe prepared that running this tool can take a lot of time! |
Windows Defender (available in the control panel) offers additional security against spyware and other malicious software (it is not virusscan software!). Besides the real time security, the computer is scanned on a daily basis (the time and frequency can be changed by Tools, link Options, task Automatically scan my computer). By default the scan results are shared with Microsoft. If privacy is an issue, sharing can be disabled by Tools, link Microsoft SpyNet. If Windows Defender is no longer needed (because other security software is used or to speed up the computer), it can be disabled by the link Options, task Administrator.
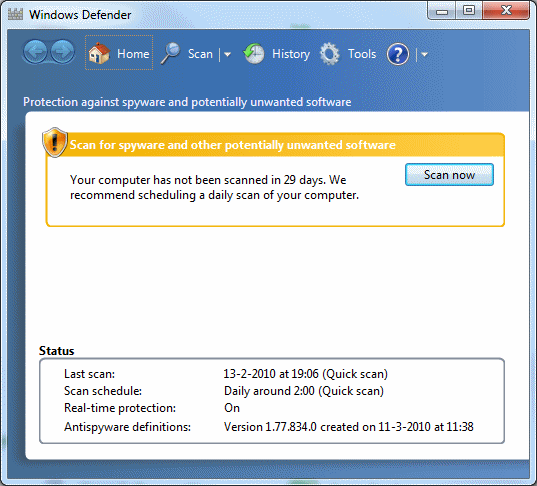
ATTENTION: The virusscan tool Microsoft Security Essentials (download: https://support.microsoft.com) contains the scanning capabilities of Windows Defender, therefore Windows Defender will be disabled when Security Essentials is installed!
The Network and Sharing Center (available in the control panel) is the place to be to check the status, analyze and solve problems concerning the network. The Network and Sharing Center has settings for sharing files, printers and public folders.
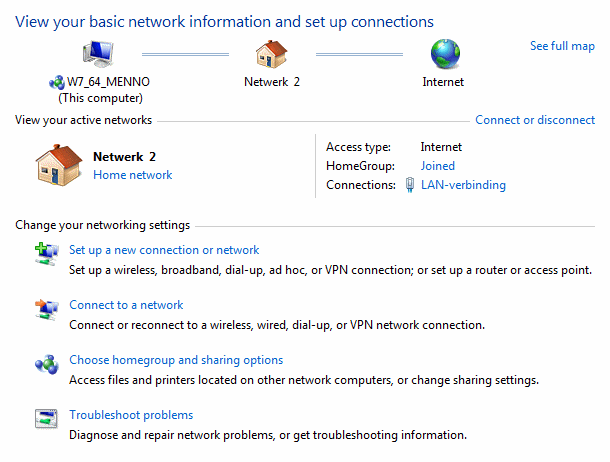
For security reasons it is better to disable the network facilities, especially when they are not used. This can be done with the task Change advanced sharing settings by disabling Network discovery, File- and printer sharing and turning off Public folder sharing. Media streaming can be disabled as well. Only disable the option Password protected sharing when it is really needed!
HomeGroup and selecting options for sharing
The HomeGroup
(available in the control panel) is an important item in the network center. The
HomeGroup can be used to share libraries (documents,
pictures, music, videos, ...) and printers with other Windows 7 computers. A
password is required for other computers to gain access to the same homegroup (containing
the personal files).
When the homegroup is not used, it is better to disable this option (by
deselecting all homegroup items).
© 2001-2022 - Menno Schoone - SchoonePC - Rotterdam - The Netherlands